Transitions are Your Friend
And other creative opportunities

Although Dancing Rabbit Ecovillage has the largest collection of natural buildings in the Midwest, tile work is rare, and mostly limited to decorative images on the outside of buildings, or small areas in an entryway.
As someone who loves tile, I noticed this as soon as I moved here, and I was always curious about this. Tile is a natural material, very durable, and it has so many creative possibilities. I think the limited use of tile has something to do with how it can create additional work to create the transitions needed between different materials, even if they are natural. Of course, I see it as a creative opportunity. Here’s a transition at the Hub, between a tile floor and a clay plaster wall.
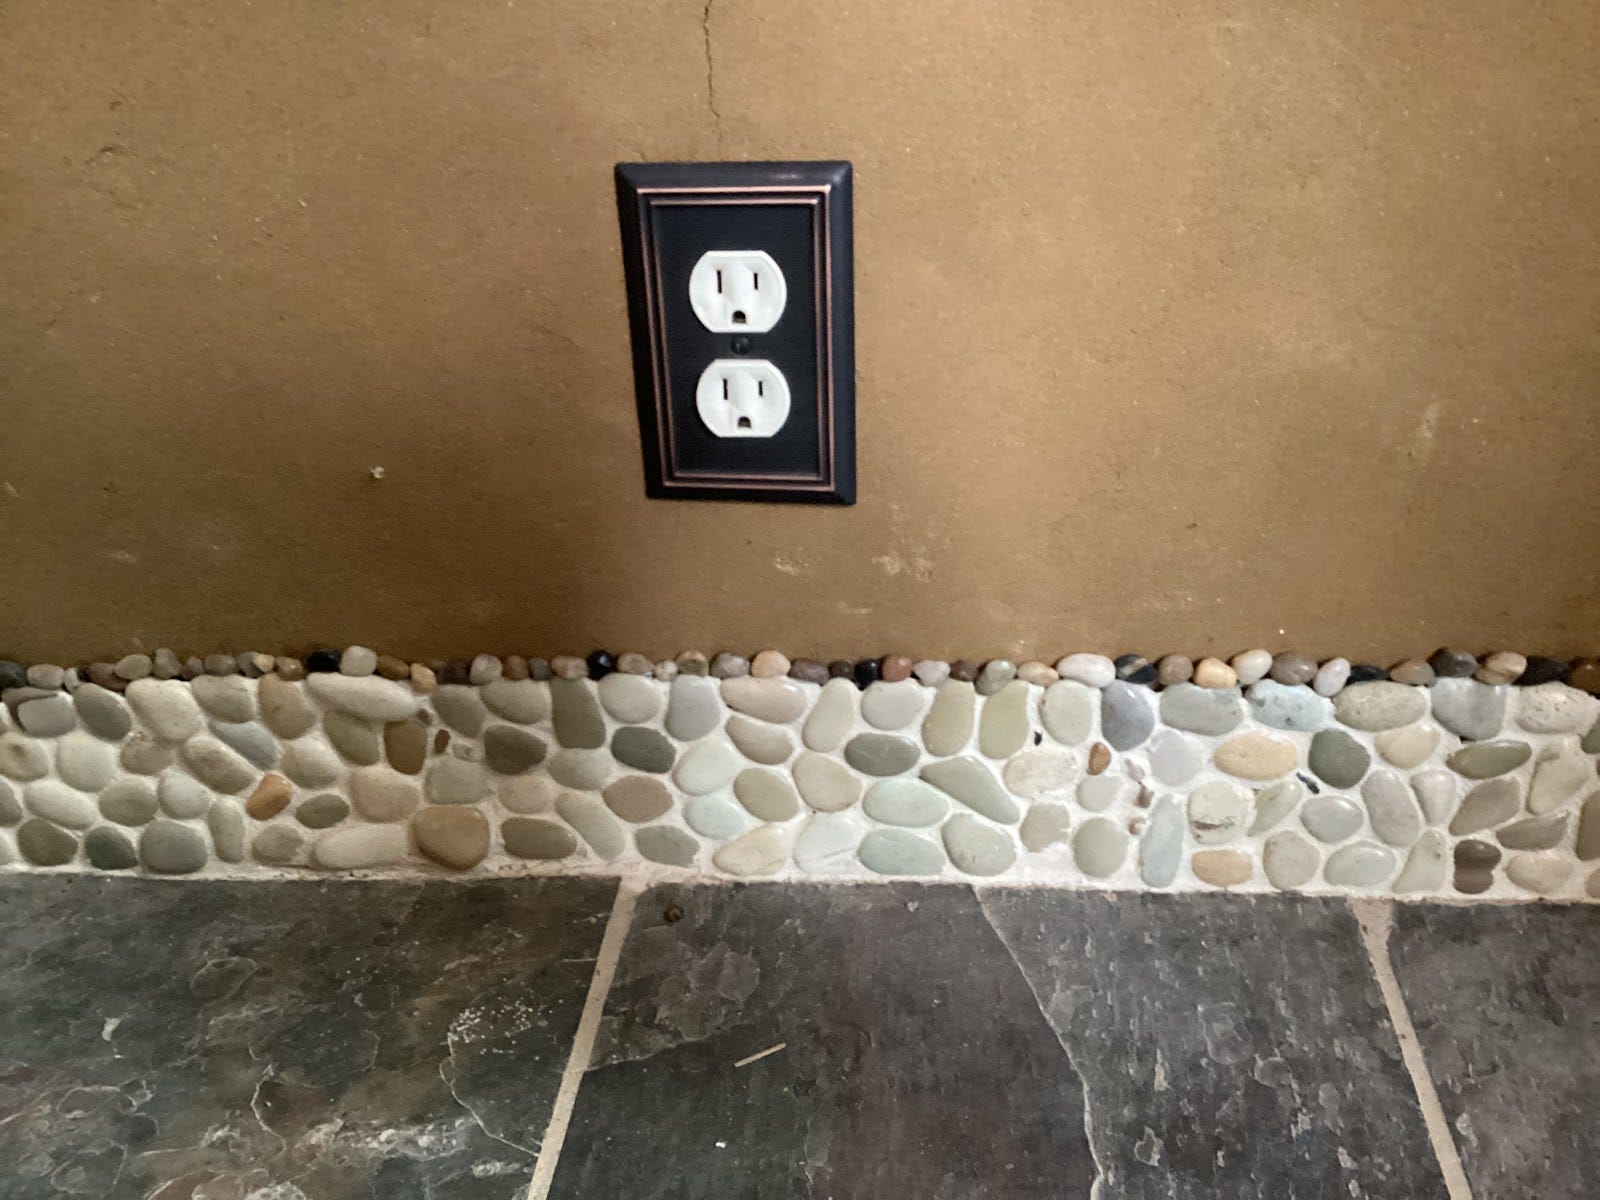
This transition affords me the chance to add some stone to the space, in the form of pebbles. It creates a baseboard that protects the bottom of the clay plaster wall, which, if left alone, is prone to crumbling at the bottom edge and scuffing.
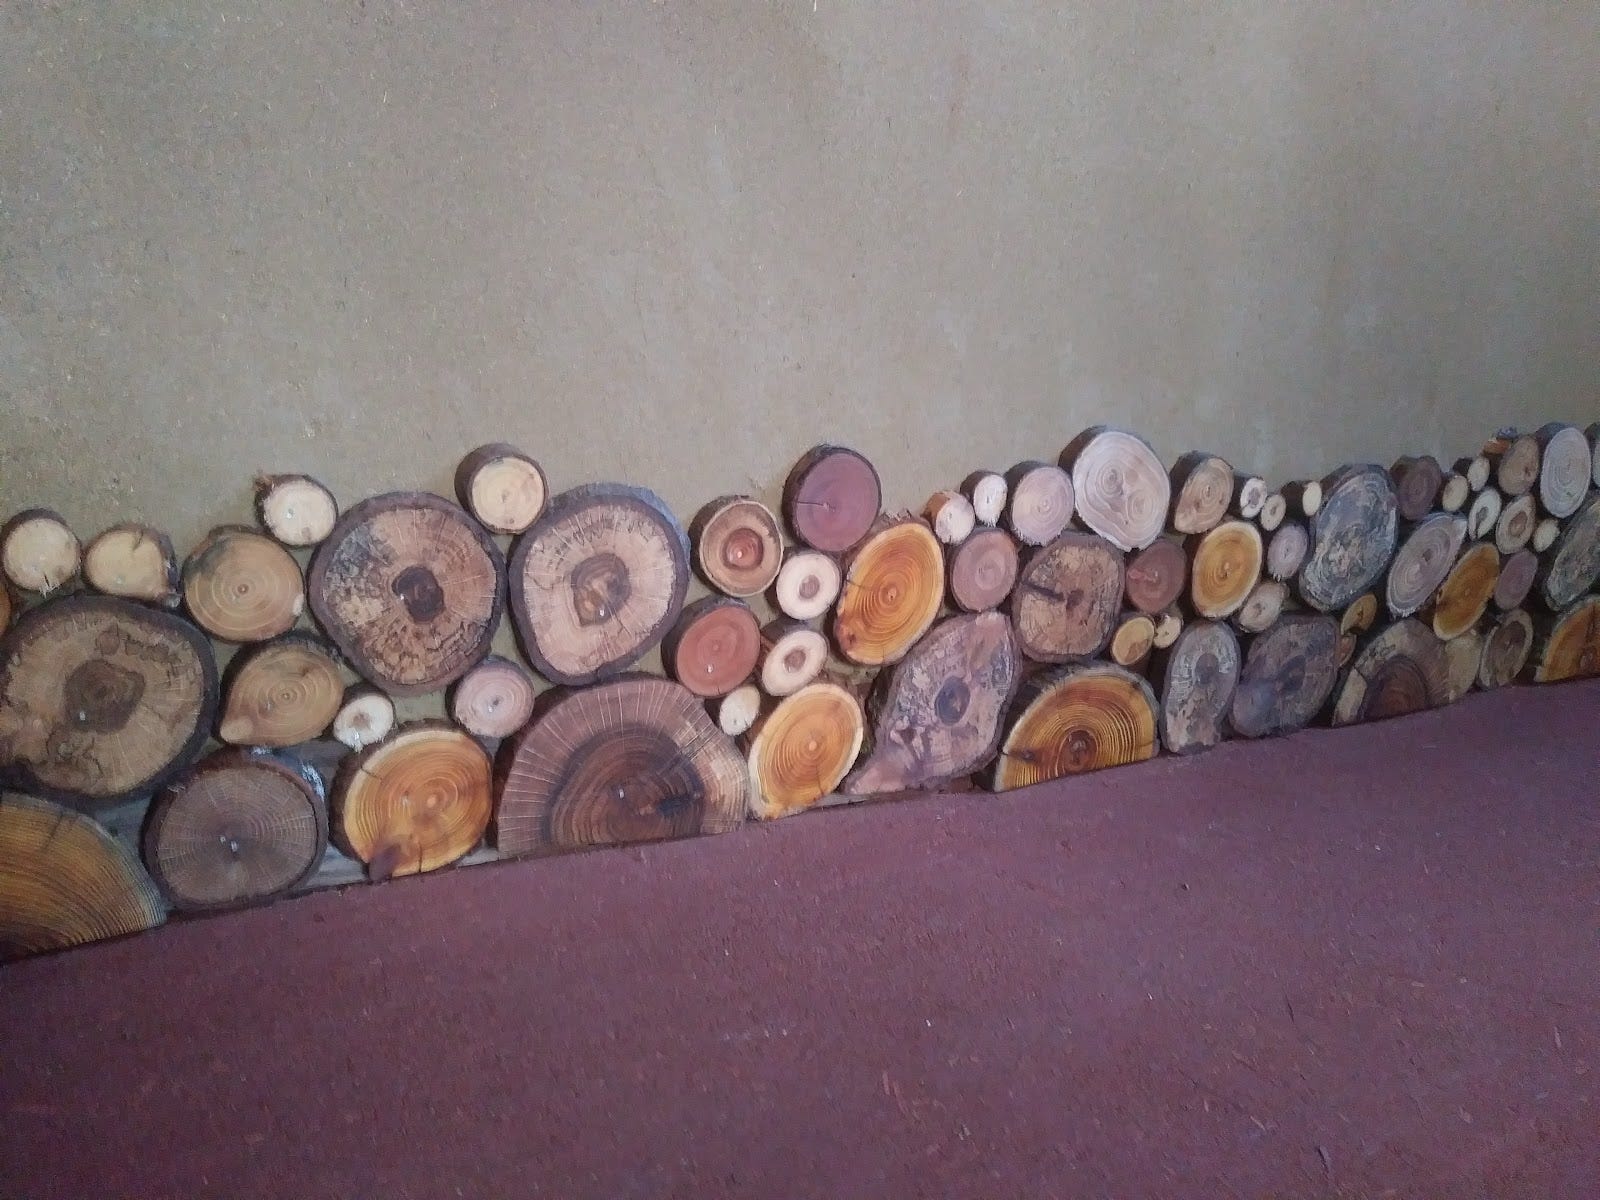
Here’s another floor/wall transition in the living room. Floors need a quarter-inch gap around the edges so that the floor can expand and contract with the seasons, so a baseboard covers the gap and makes it look better. This baseboard is made out of branches gathered from all over the village and cut into discs, or cookies. The discs are brushed with borax to discourage insects and mold, and then brushed with tung oil to harden them and bring out their colors and grain. I then nailed each one to a 2x4 attached to the wall plate.
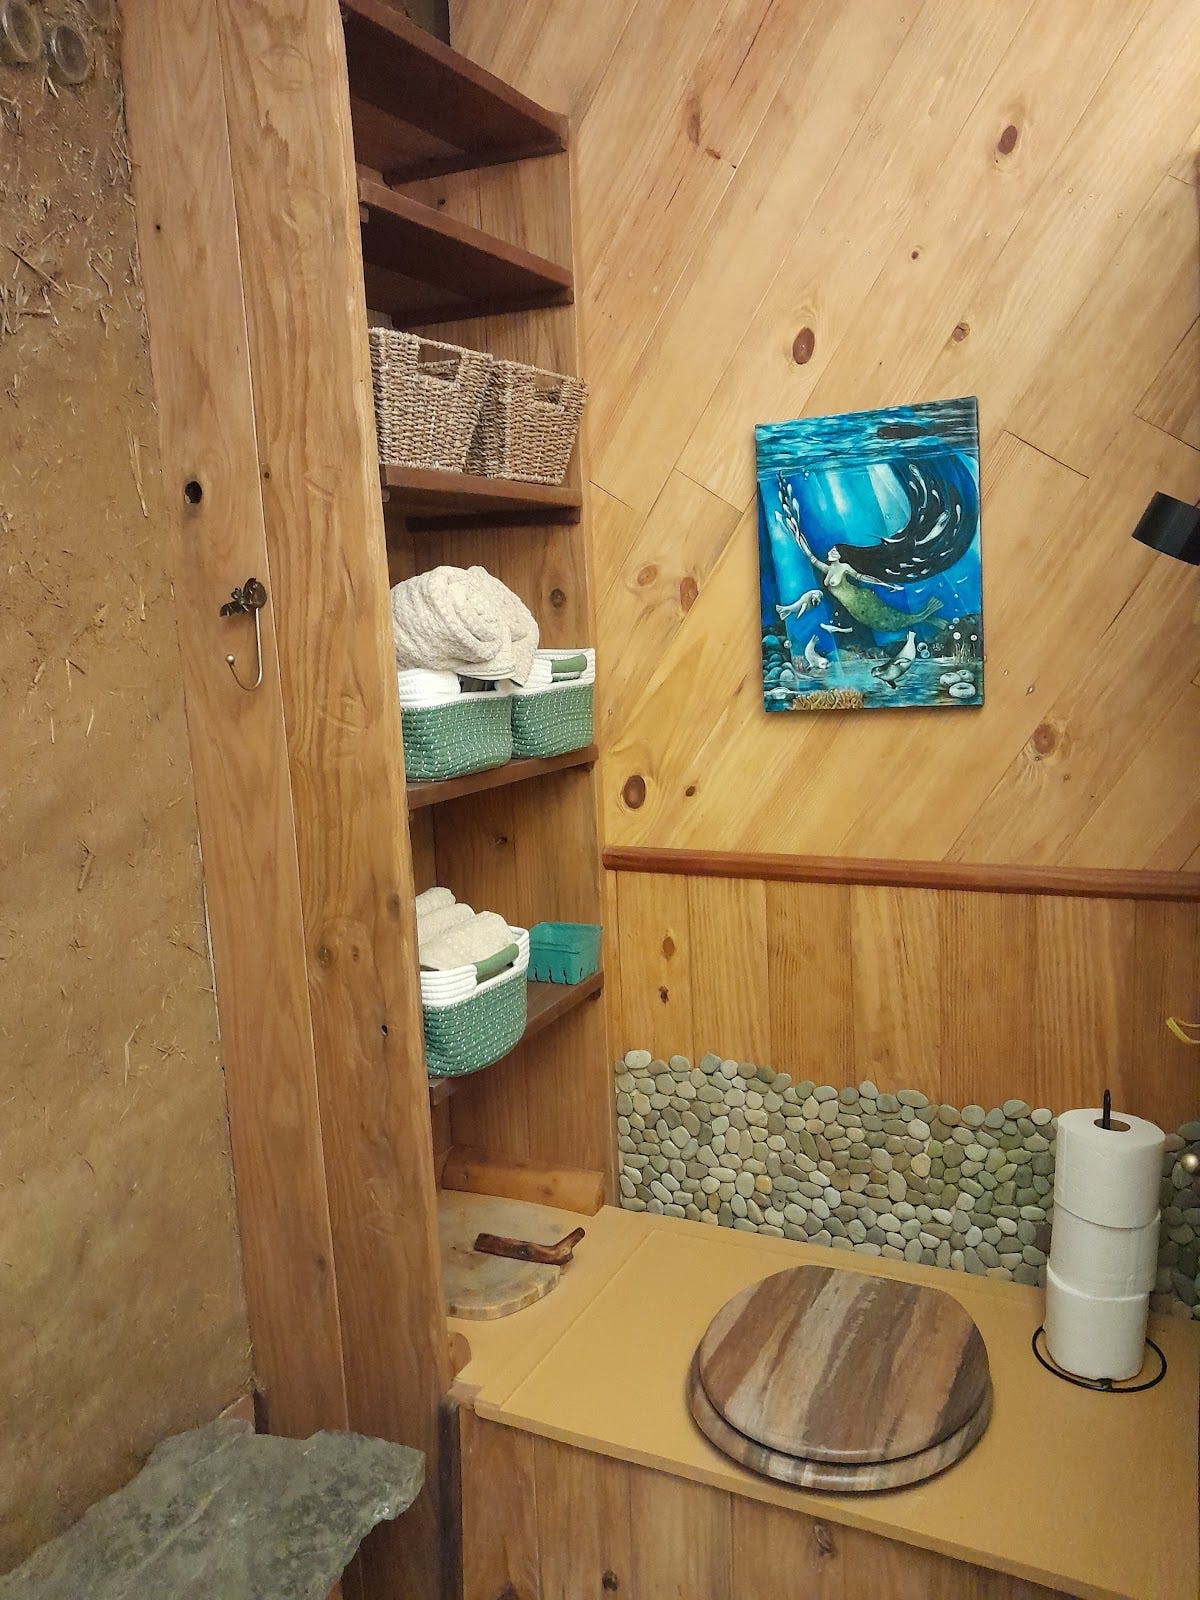
Transitions galore in the bathroom
I encountered transitions galore when I built the bathroom at the Hub. I had pallet boards attached at a slant for the top part of two of the walls, with pallet boards perpendicular to the floor for the bottom half of the wall. I then put a trim piece across the slightly uneven edges where the boards met. I didn’t really realize when I started implementing my design, just how much trim was involved. In the photo you can see the wood trim between the two sections of wall and pebble tile to provide a washable backsplash for the toilet. There’s trim where the shelves meet the toilet bench, and trim where the toilet bench meets the tile floor.
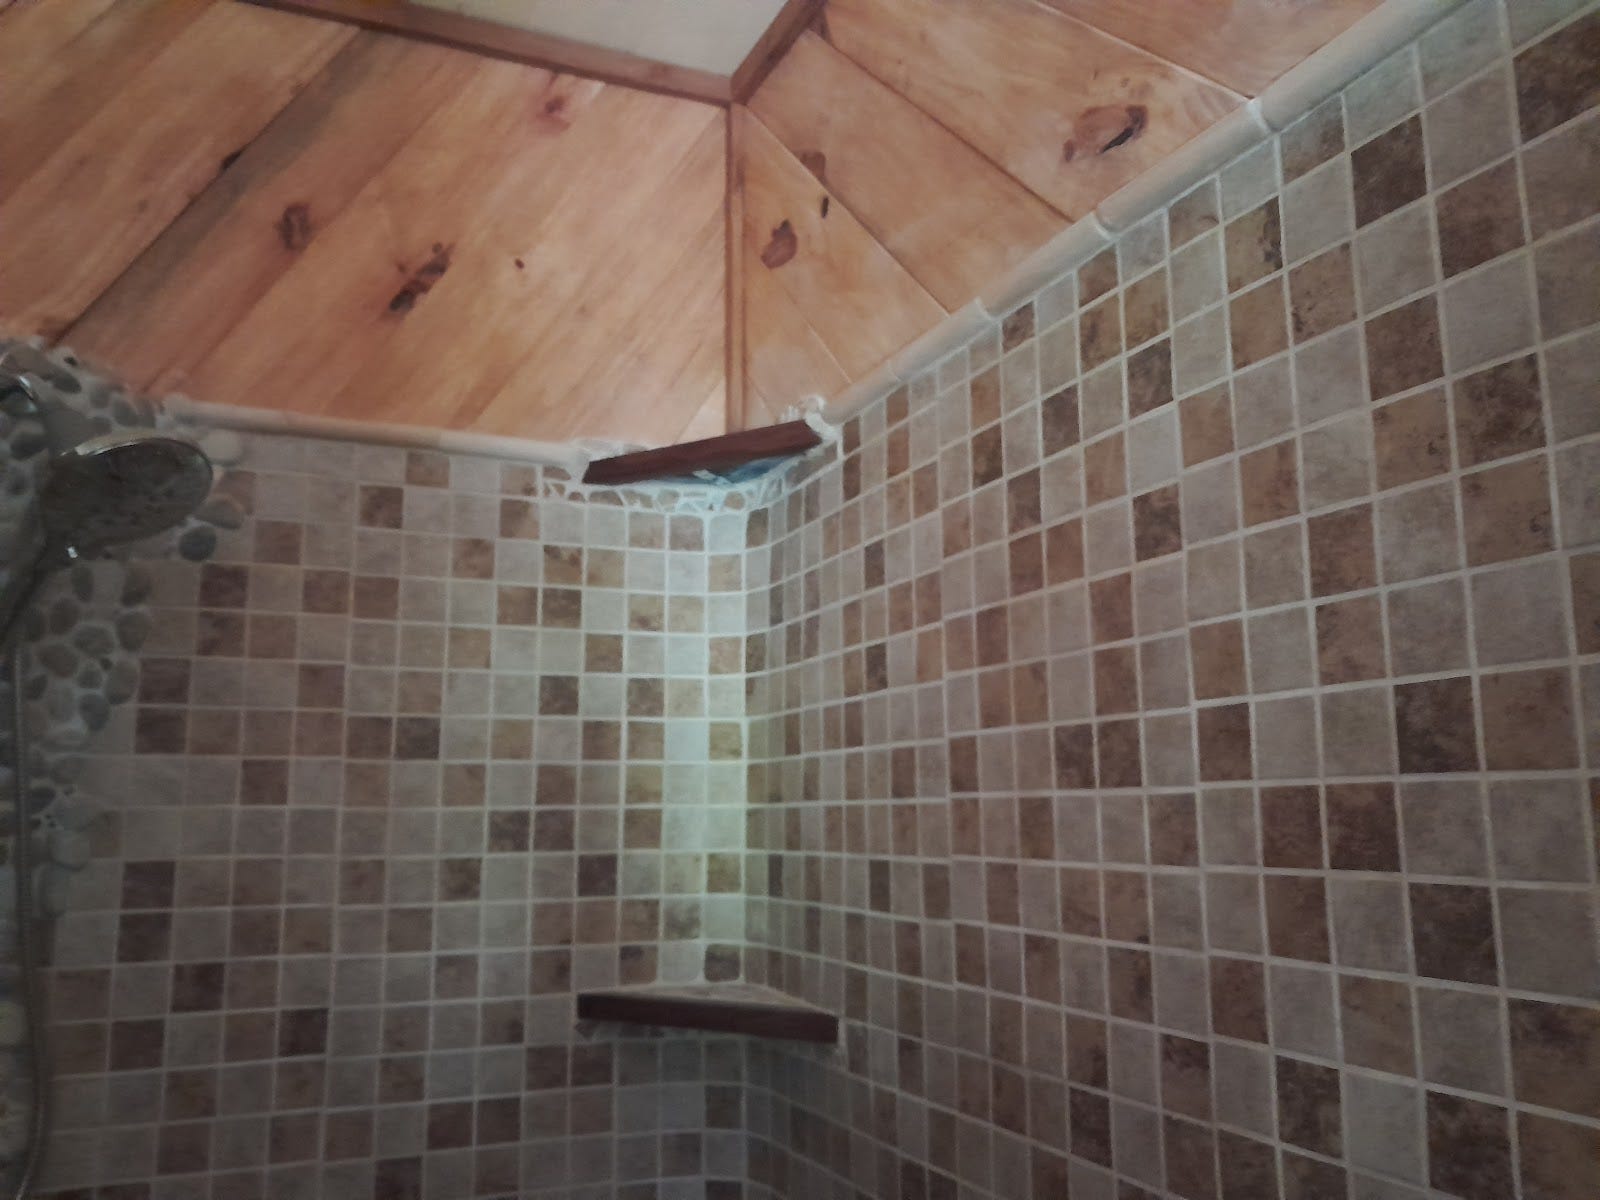
Where the top of the tiled shower stall met the slanted wood boards, I mortared bullnose pieces of tile horizontally over the slight gap between the two materials. I layed down clear caulk on the edge to keep water from getting inside the wall.
Mosaic tiles jazz it up
I was determined to create a waterproof environment in the bathroom, and my answer to that was to use a lot of tile. Inside the shower stall, I used pebble tile and mosaic tile. The pebble tile is thicker than the two-inch mosaic tile, which created the edge between the two.

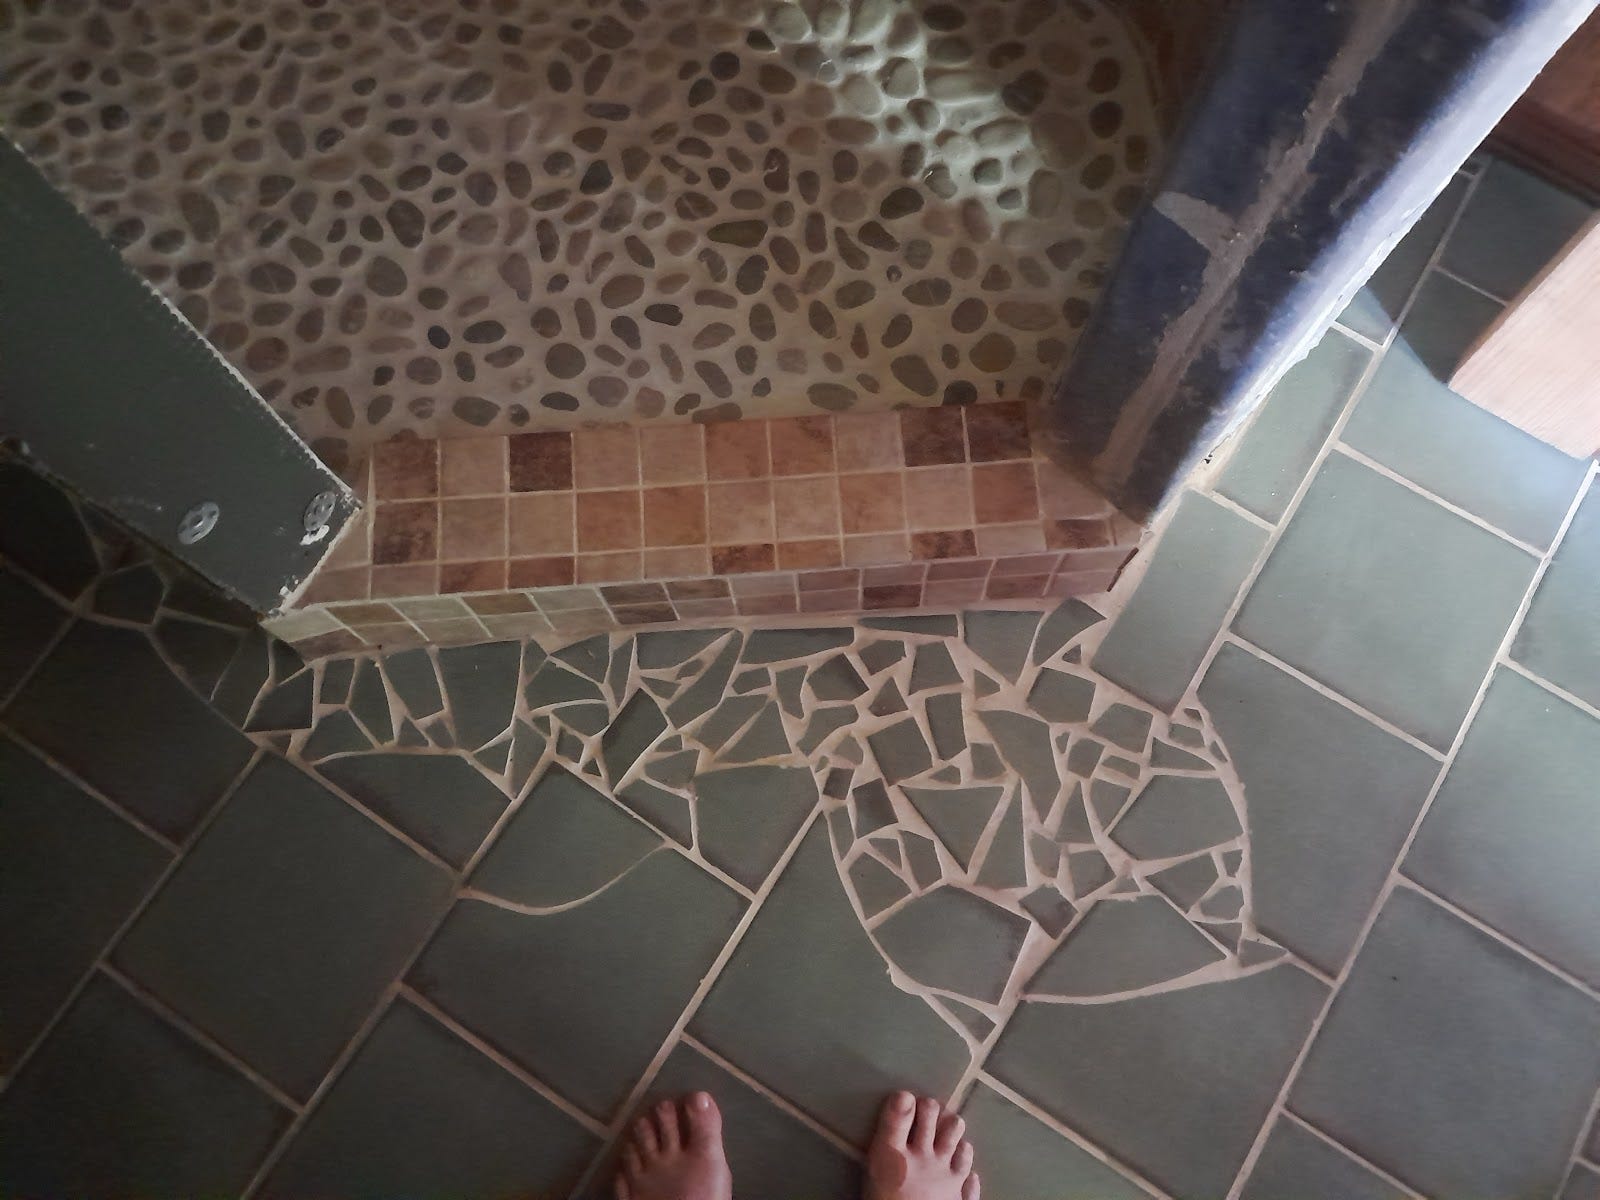
I created a curb at the entrance to the shower to prevent water from backing up into the room. I created a mosaic to mark the transition from the curb to the floor. The pebbles on the shower floor create a safer surface to stand on than if I had used the square tiles there. You can see how clearly the curb stands out, providing a visual cue.
Putting tile over clay plaster
There’s not much written about doing this, so I found my own way. In the years since, I’ve noticed more builders doing it this way.
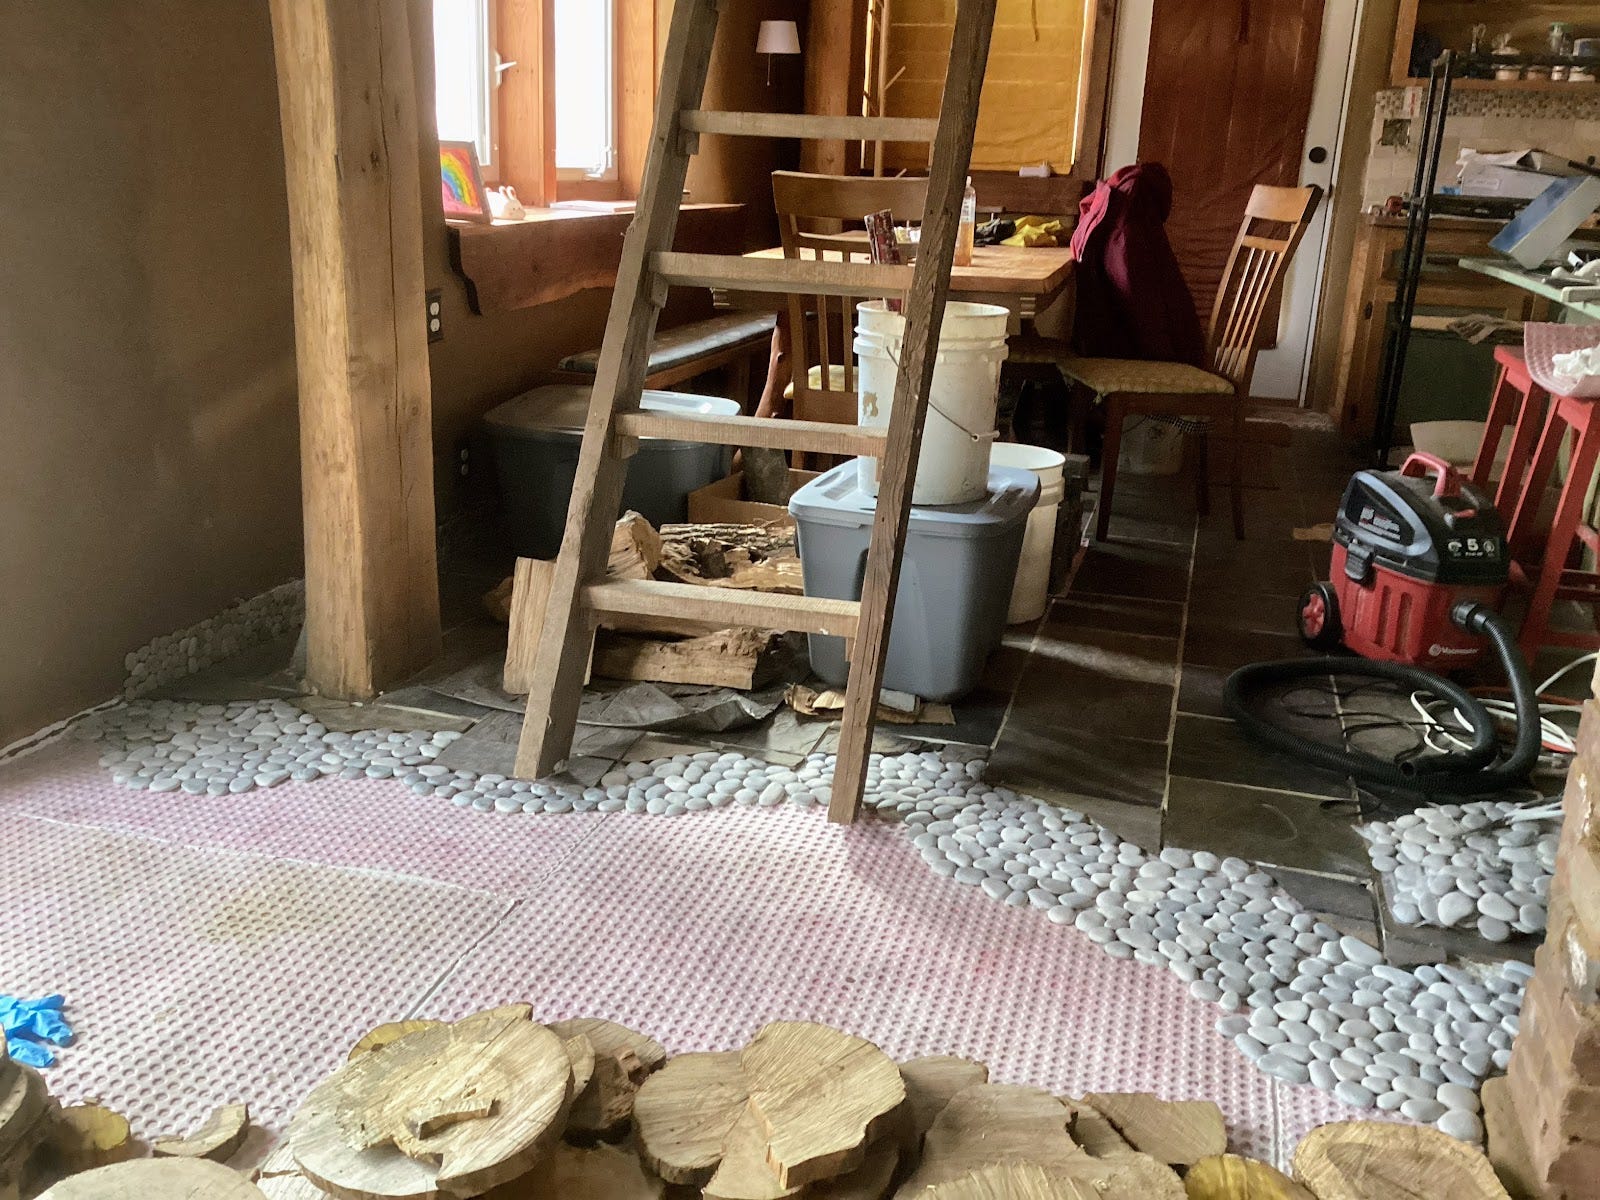
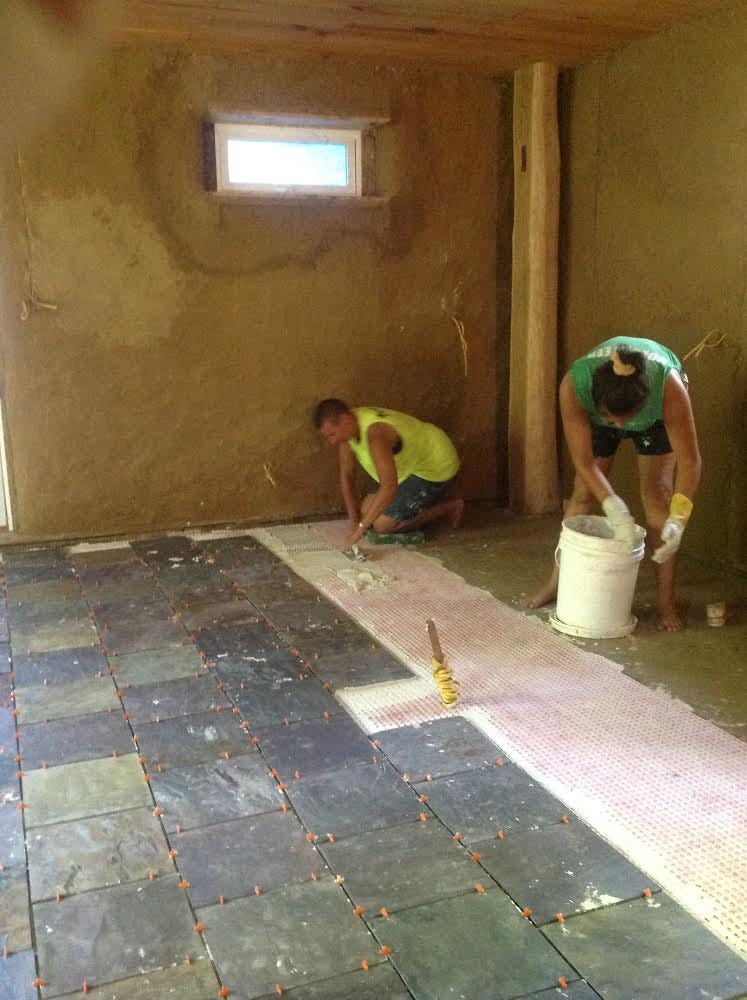
My kitchen floor started with a cob plaster subfloor. I was originally going to put a layer of finish plaster over that and call it done, when I reconsidered. I knew the kitchen floor was going to take a beating, so I decided to use slate tiles instead. The issue was how to attach the tiles to something that wasn’t crumbly. I mortared something called an uncoupling mat on top of the cob subfloor and then mortared the tile to the mat.
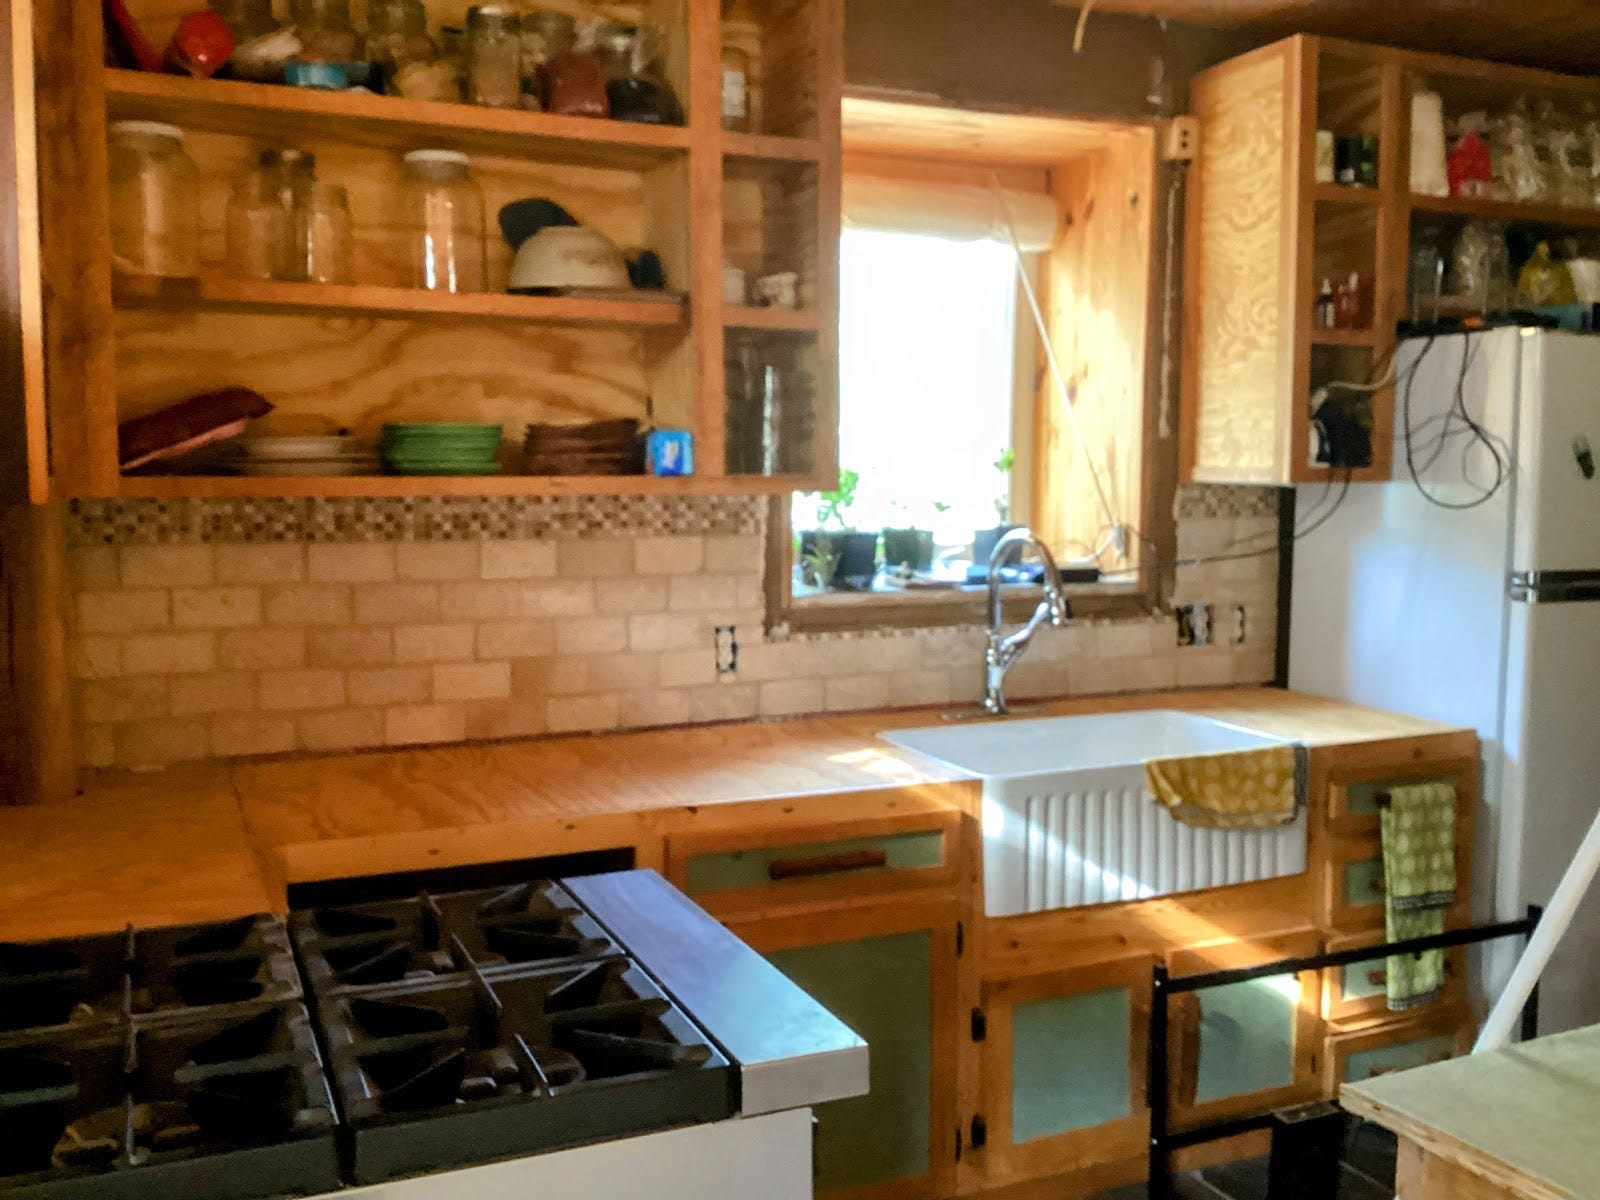
Kitchen backsplash to protect clay walls
I spent a lot of time figuring out the kitchen backsplash, which is why it was one of the last things we worked on. On the one hand, there was the puzzle of how to attach something to clay plaster, and on the other, I was reluctant to cover any of the beautiful walls. But they had to be protected from food and grease during cooking. So we mortared the uncoupling mat to the backsplash area and my sister talked me into getting white tiles with a contrasting border. A wood trim was added for the transition from the wood countertops to the tile backsplash.
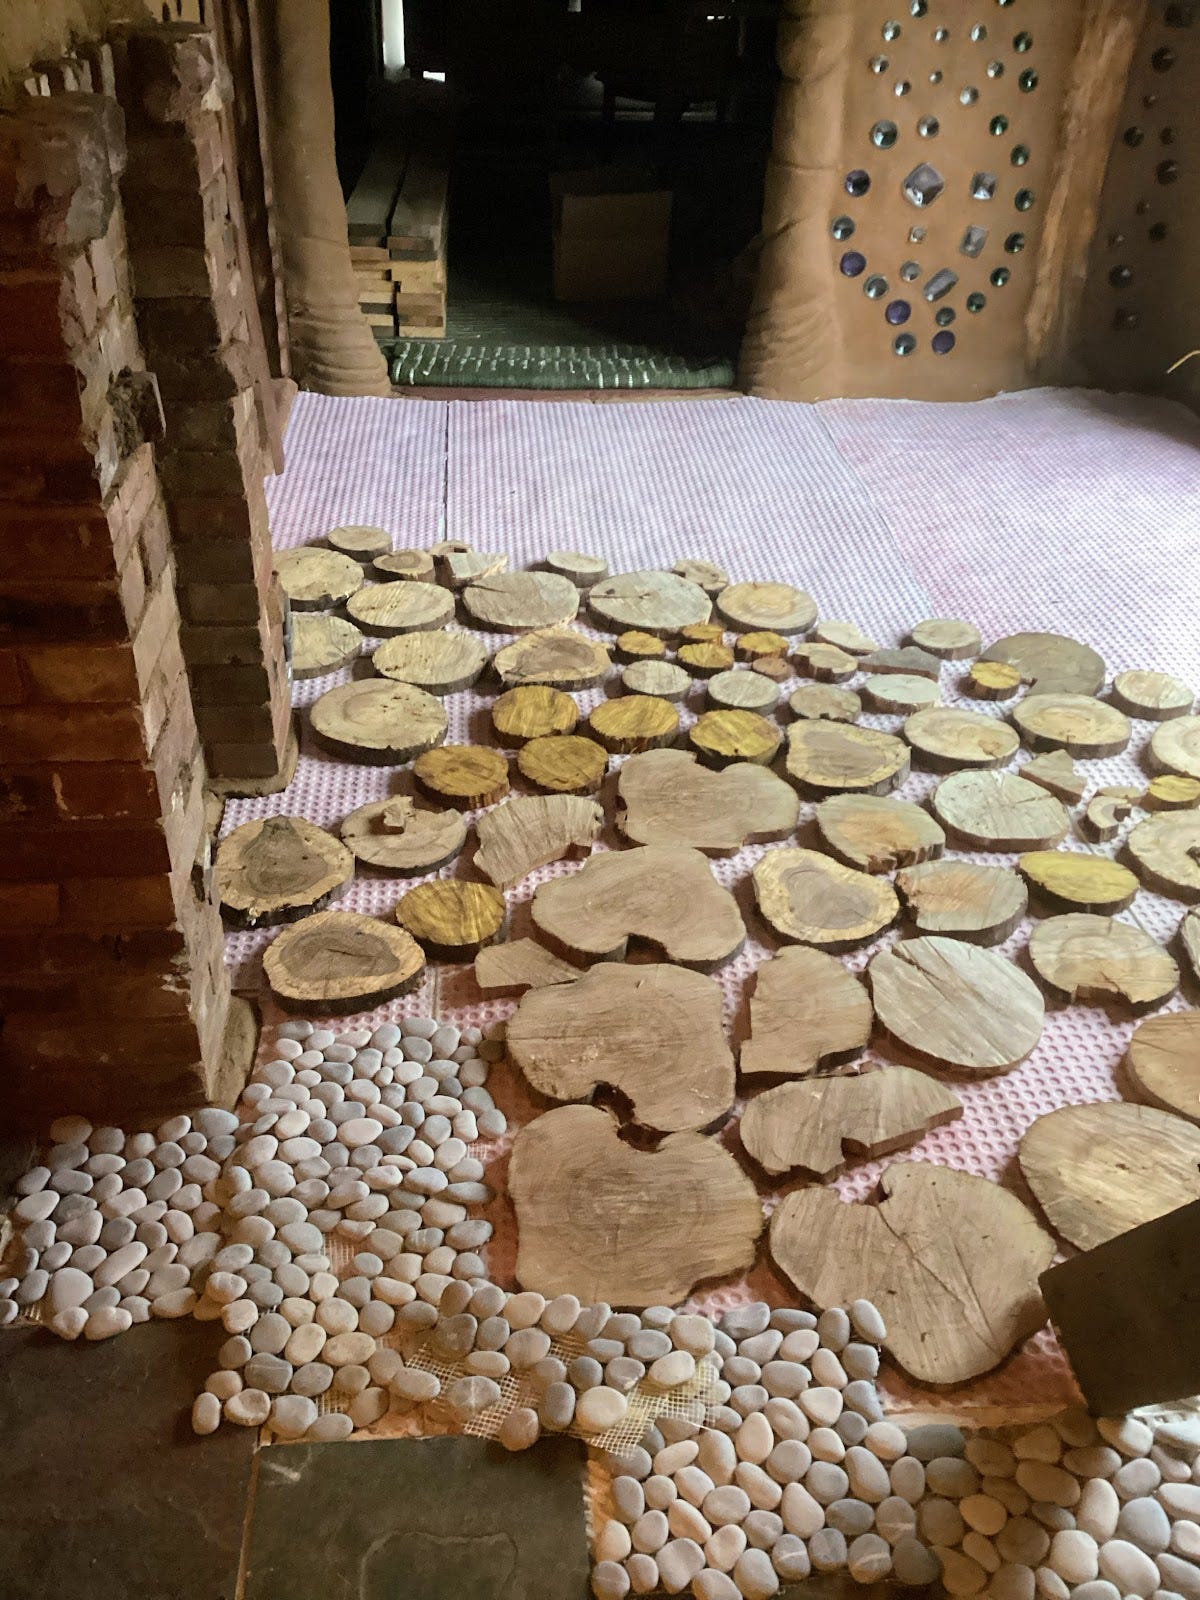
Tile transitions between floors
Here’s a border I created to mark going from the kitchen to the hall. I used the uncoupling mat again. Cordwood pieces of wood will form the hall floor itself. Second photo is a trial layout of the materials.